Installation
Run the following the pull in the package with composer:
composer require codedge/statamic-google-merchantBasic configuration
Currency
The configuration can be done in the config/google-merchant.php file.
'currency' => [ 'symbol' => '€', 'iso_code' => 'EUR',]Widget
You can add a widget to your dashboard by adding google_merchant to your config/statamic/cp.php file.
'widgets' => [ [ 'type' => 'google_merchant', 'width' => '50', ], // other widgets]Selecting collections, file output path
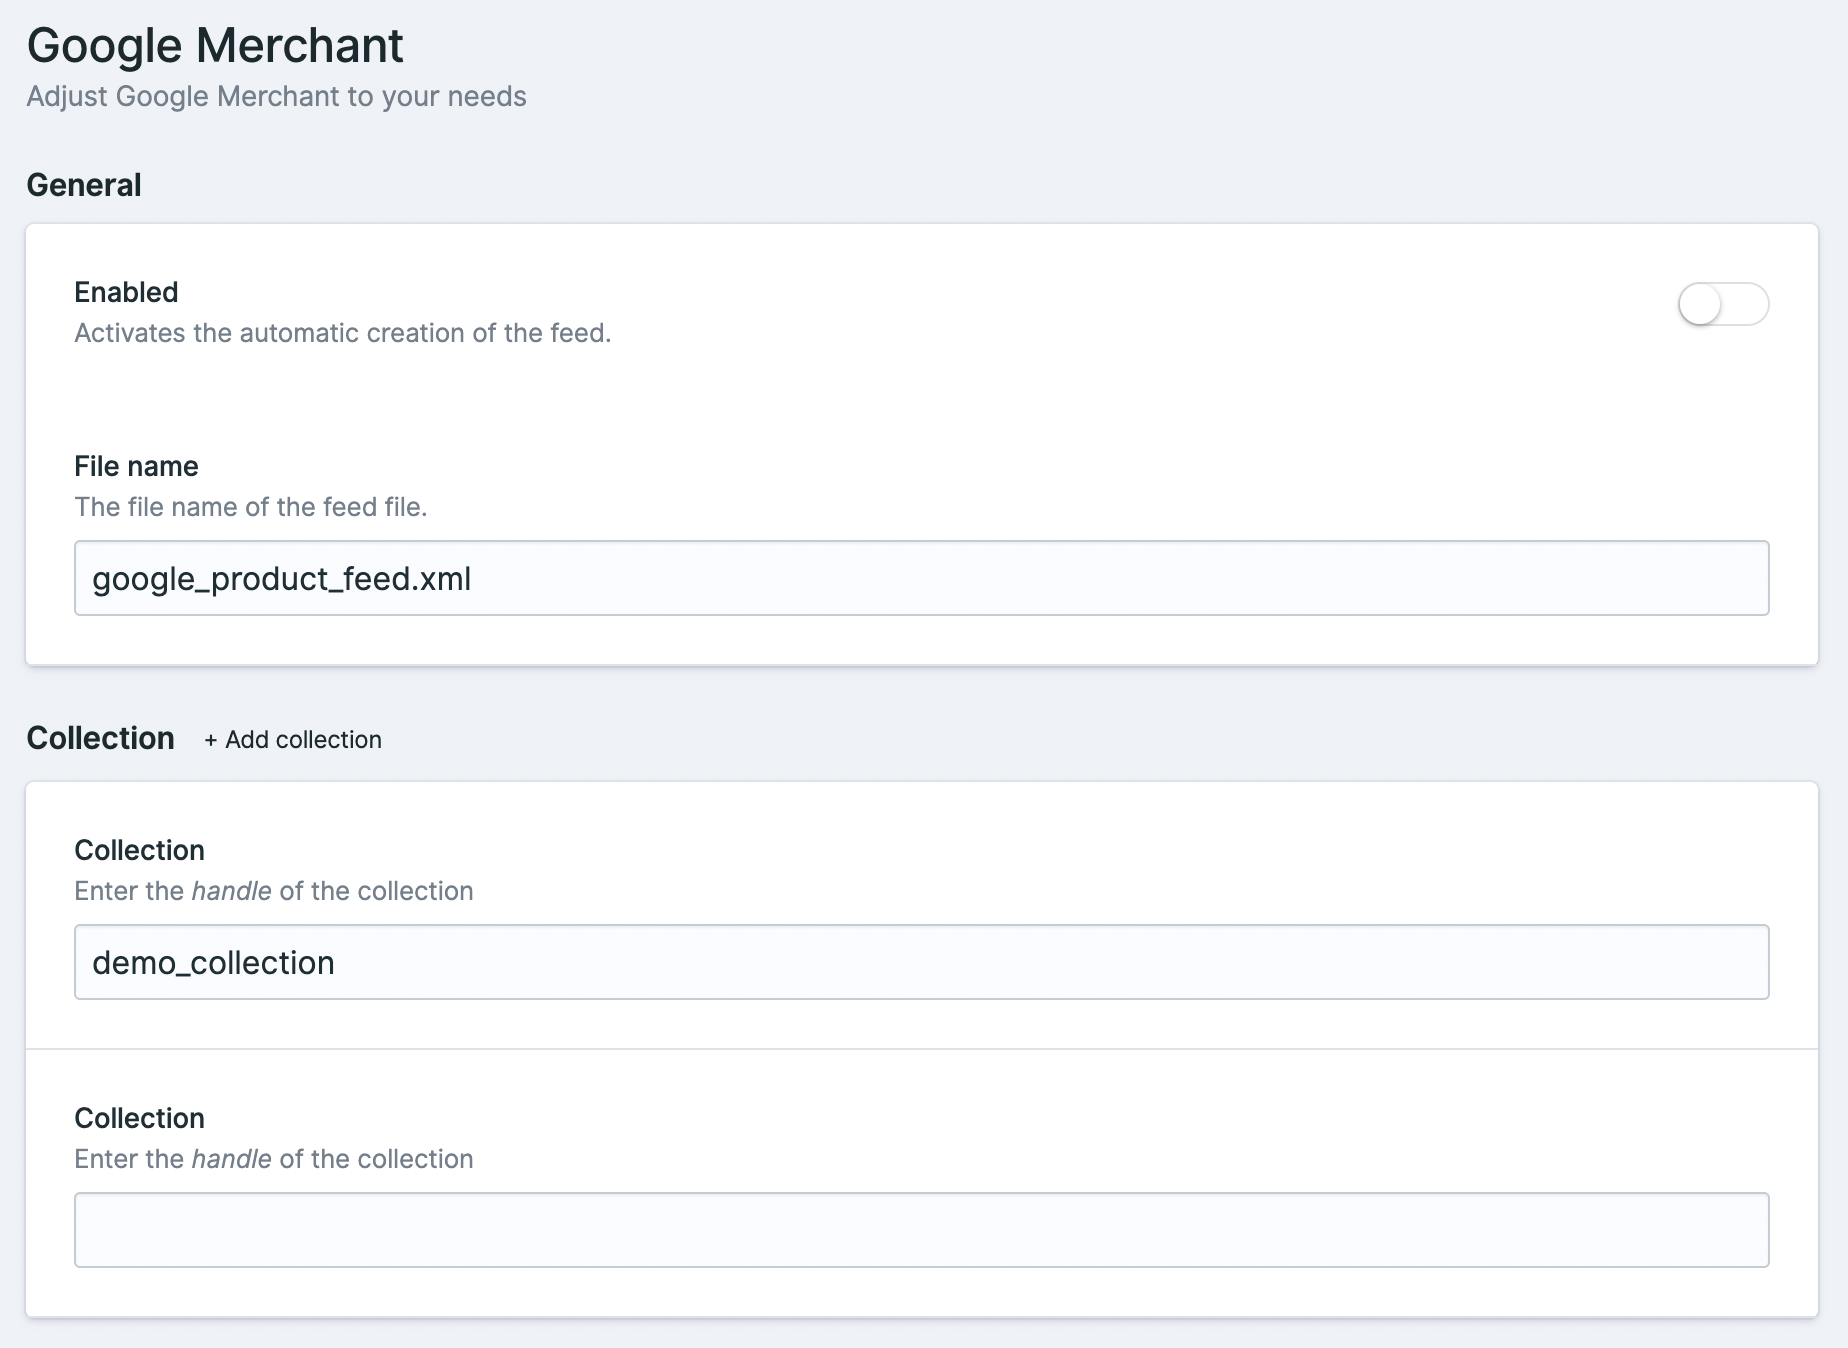
In your Statamic Control Panel (CP) in the left sidebar you will find a link to Google Merchant settings. Here you can set up in which collections your products reside, which file name or file path you want to output the feed to.
File output
The generated field file is saved on the public disk. So make sure you actually have one.
If you want to put it in a subdirectory, just enter it in the Control Panel like feeds/gmf.xml.
Collections
The handle of the collection specified should actually exist. Currently, there is no validation if the collection entered
Also make sure that every collection has all the fields that are required to build the field.
Fields (global)
For each field in the feed you can configure either a fixed value or another field, where you already have the field value in.
- Static value for a field:
My static value - Reference the
titlefield for the product name:{{ title }}
Whenever you entered a value enclosed in curly brackets {{ }}, the value is considered being a field.
Fields per products
You can also add the fieldset that is shipped with the package to configure every field for every product on its own. Just add the fieldset to your blueprint, and you are good to go.
