 dryven
#Cookie Byte Documentation
#Installation
- There are two ways to install Cookie Byte on your site:
- From the
Tools > Addonsmenu in the Control Panel - In the console via composer
composer require ddm-studio/cookie-byte
- From the
- Add the tag
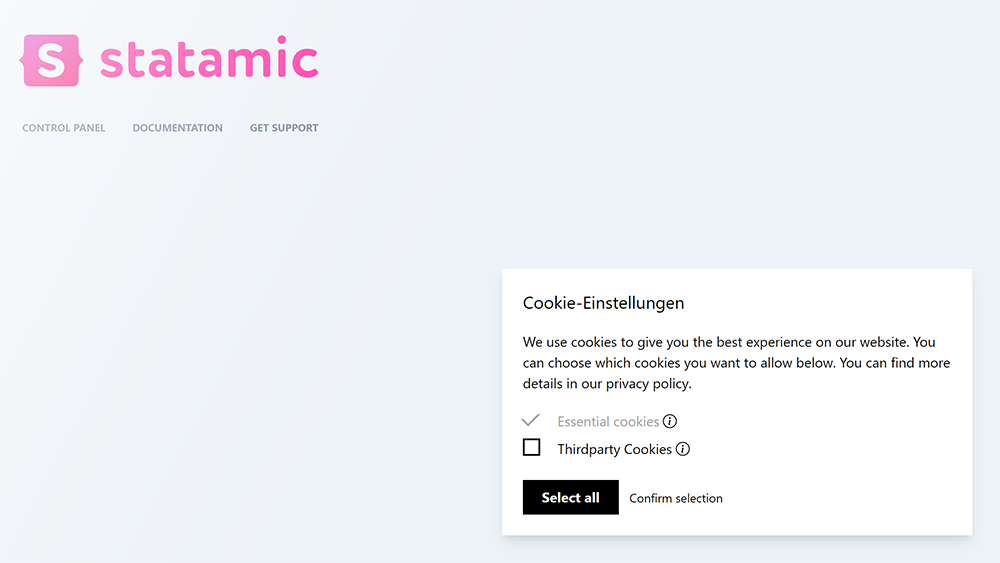
{{ cookie_modal }}as far up in the body tag as is comfortable for you. - Test it out by going on your page and seeing something like below. You've done it!
#Control Panel
After the installation, a new menu item spontaneously appeared in your site's control panel: The settings for Cookie Byte! Play it cool by immediately clicking on it. You'll be surprised by the three tabs in which you can do your magic. By default, we added some placeholder texts, so you can play around with the addon right from the start.
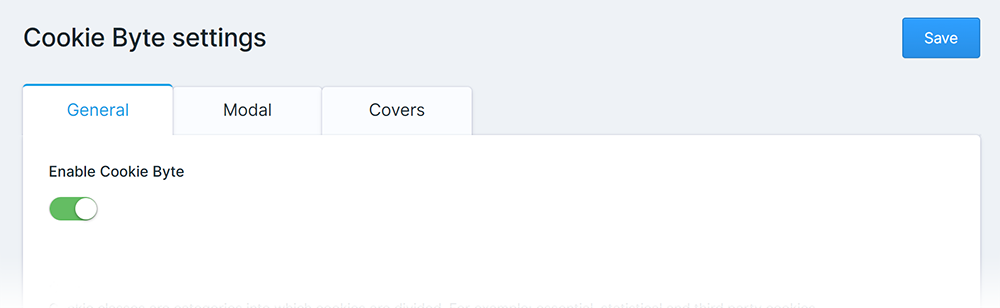
- General
- Enable Cookie Byte
- Cookie categories
- Name
- Handle
- Required
- Description
- Code snippets
- Developer settings
- Custom CSS styling
- Custom JavaScript code
- Modal:
- Headline
- Description
- Button "Select all" and "Confirm selection"
- Horizontal and vertical position
- Background type
- Covers:
- Cookie content covers
- Name
- Handle
- Cookie categories to be accepted
- Headline of the cookie content cover
- Paragraph
- Button "Accept cookies"
- Background image
- Cookie content covers
#Antlers Tags
What has this addon to offer in Antlers Templates? We provide three distinct tags: CookieConsent, CookieCover and CookieModal. Let's see them in detail.
#CookieModal
{{ cookie_modal }}This simple one-liner adds the Cookie Modal you've seen above in Installation. It automatically puts together the texts, cookie categories and decisions you've made in the CP and puts them in one box for users to decide if they want to accept the cookies on your site. It is recommended to put this in your layout template file, because (unless you include JavaScript and CSS yourself) every other functionality, like the Cookie Cover, won't work.
#CookieCover
{{ cookie_cover:... }}{{ cookie_cover handle="..." }}The CookieCover tag adds a special cover before a specific HTML snippet can be placed on the website. Be sure to create the cookie content cover in the control panel first and pass its handle to this tag. A typical implementation looks something like this:
{{ cookie_cover handle="google-maps" }} <iframe src="..." width="500" height="500"></iframe>{{ /cookie_cover }}Depending on your use-case, the cookie cover can look something like this:
#CookieConsent
{{ cookie_consent:... }}{{ cookie_consent cookieCategories="..." }}{{ cookie_consent has="..." }}This tag either takes a string or a string variable and checks if the given cookie categories have been consented to.
You can either put a single category like "essential" or a comma-seperated list of categories like
"essential,thirdparty" in it. You can use it like this:
{{ if { cookie_consent has="marketing-cookies" } }} {{# code that should be executed #}}{{ /if }}It's a pretty useful feature to check if the cookie category has been set on a previous visit to the page. Be aware that this will not work if you enabled static caching and will break things like analytics as these require to be loaded as soon as the cookie categories are accepted. Do this by adding a code snippet in the control panel.
#Advanced configuration
#Publishing the view
Want to tweak the modal or cover just the way you imagined it? Then don't wait any longer and put the following line in your console, and you're ready to change every bit and byte in these.
php artisan vendor:publish --tag="cookie-byte-views"#Publishing the default settings
Have you deleted the default settings we provide at the start and you want to see them again? We're more than happy to make this dream possible to you, by providing the command in the next line of this page.
php artisan vendor:publish --tag="cookie-byte-settings"#Publishing the config
There are some config preferences you may want to change. In order to do so, go ahead and publish the config file to your project's config folder:
php please vendor:publish --tag=cookie-byte-configYou will receive a new file called cookie-byte.php in your config folder:
/*** This specifies the asset container, which is used for all asset fields in the Cookie Byte config.*/'asset_container' => 'assets', /*** This specifies the collections, entries can be selected from in any bard field inside the Cookie Byte config.*/'link_collections' => ['pages'], /*** This specifies the directory, in which the addon will save its Control Panel configuration file.*/'config_dirname' => base_path("content"), /*** This specifies the value to save the configuration under.** Allowed options:* - \DDM\CookieByte\CookieByte::HANDLE_IDENTIFIER | Uses the site handle to save. Useful if you have multiple domains.* - \DDM\CookieByte\CookieByte::LOCALE_IDENTIFIER | Uses the site locale. Recommended if you only translate the text.*/'site_identifier_type' => \DDM\CookieByte\CookieByte::LOCALE_IDENTIFIER#Publishing the languages
Does your customer or other team members on your site speak a different language? Cookie Byte comes with English and German per default, but if you want to add another language or change the current Control Panel titles then publish them by copying this line in your console
php artisan vendor:publish --tag="cookie-byte-lang"#Custom styling & code
Here's the bit every developer was waiting for: How can you get more out of the addon? How do you add your own site-specific styling to the modal? And how do you save another 3.14 kilobytes of data by compressing the JavaScript even more? Well, let's answer that here.
First you should enable the one or the other toggle we provide in the Control Panel settings, namely the Custom CSS
styling or the Custom JavaScript code option. These deactivate the automatically added style/code snippets added
along the cookie modal HTML element. Now you're on your own -- but we won't let you starve, here are our pre-defined
styles and JavaScript code files ready to be published in your resources/vendor/ directory:
php artisan vendor:publish --tag="cookie-byte-resources-custom"The CSS stylesheets are written with postcss and the postcss-nested plugin, to make our and your life easier.
You can drag them out of the vendor paths and start changing whatever you like about the stylesheet, for example
matching the buttons to your pages or rounding the corners like they are on your card modules. But be aware: there are
some categories that make the options in the control panel useable, like the position of the modal.
Adding the JavaScript to your site's script file is just as easy, if you use ES6 or some translation tool
like webpack (our choice). You can import the modules that are useful for you, like this:
import { CookieConsent, // The class for managing the cookie consent CookieCovers, // The class for initializing the content covers CookieModal // The class for initializing the modal} from './cookie-byte';Now you can use these everywhere in the code, and do fun stuff with them like initializing the objects on your page, registering callback right in your code (instead of the control panel), checking consent for multiple categories, repeatedly showing and hiding the modal and much more:
const initMySite = () => { window.CookieConsent = new CookieConsent(); window.CookieModal = new CookieModal(window.CookieConsent); window.CookieCovers = new CookieCovers(window.CookieConsent); window.CookieConsent.registerCallback('essential', () => { console.log('HELLO :-)');W }); if (window.CookieConsent.hasConsent('essential,thirdparty')) { console.debug('Yes, we made it in!'); } for (let i = 0; i < 10000; ++i) { window.CookieModal.hide(); window.CookieModal.show(); }};#Adding an "Edit cookie settings" button
For a better GDPR compliance, your website needs the option to review and edit the cookie settings after they have made their initial decision. For this, you need to activate the 'Custom JavaScript Code' option in the Control Panel. After that you have two options to implement the button:
First option
Add the first snippet to the initialization code of your website's JavaScript code, so that you create a variable in global space that can be accessed from anywhere else on the document.
window.CookieConsent = new CookieConsent();window.CookieModal = new CookieModal(window.CookieConsent);window.CookieCovers = new CookieCovers(window.CookieConsent);Now you can access the code for a button, that opens the CookieModal after it was pressed. Voilà!
<button class="btn-cookie-settings-edit" onclick="window.CookieModal.show()">Edit cookie settings</button>Second option
If you despise inline JavaScript in HTML documents as much as grapes on pizza, you could add an event listener to the button in your website's initialization script instead of defining global variables.
const cookieSettingsEditButtons = document.querySelectorAll('.btn-cookie-settings-edit');cookieSettingsEditButtons.forEach((cookieSettingsEditButton) => { cookieSettingsEditButton.addEventListener((event) => { window.CookieModal.show(); });});