Features
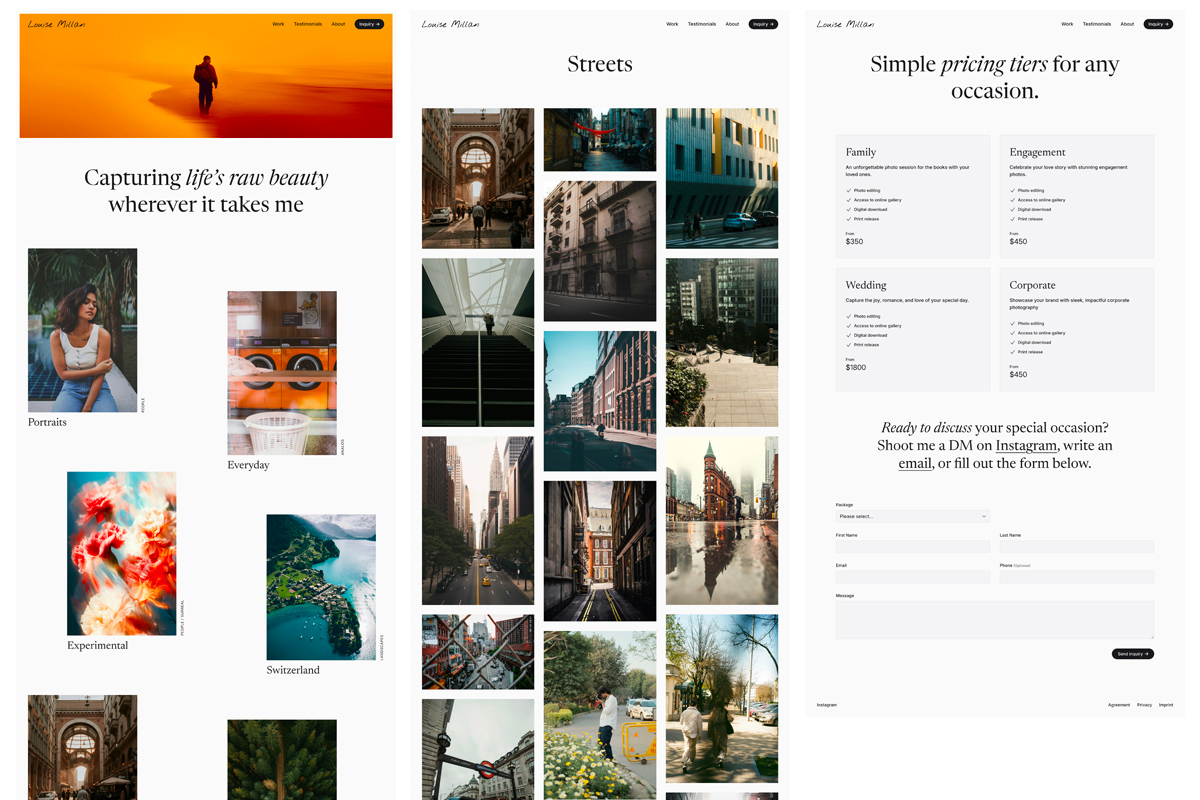
- Show your work with the galleries collection
- Share photos with private galleries
- Categorize galleries with the categories taxonomy
- Interactive categories filter linking to the taxonomy term page
- Responsive and lazy-loaded images for fast load times
- Build trust with client testimonials
- Page builder with blocks for galleries, bio, testimonials, forms, and more
- Pricing cards
- Inquiry form
- Clean & modern design
- Beautifully responsive
- Built with Livewire, Alpine.js, and TailwindCSS
Private Galleries
- Password protection with gallery-aware login page
- Image processing with options for watermark and low-res images
- Download and like individual images
- Download a zip of all images or a selection thereof
- Gallery zoom
Live Demo
Check out the live demo of the starter kit. You can also take a look at a private gallery. The password is secret.
Quick Start
1. Create a new site
You can create a new site using the Statamic CLI Tool:
statamic new your-site statamic-rad-pack/starter-kit-photographerOr you can install manually into a fresh Statamic installation by running:
php please starter-kit:install statamic-rad-pack/starter-kit-photographer --clear-site2. Make a new user
The above installers should prompt you to make a user, but you can also run php please make:user. You'll want it to be a super so you have access to everything.
3. Recompile the CSS and JS (optional)
This starter kit comes with precompiled CSS and JS. If you want to modify anything, just recompile it.
npm i && npm run devTo compile for production again:
npm run build4. Do your thing!
If you're using Laravel Herd (or similar), your site should be available at http://your-site.test. You can access the control panel at http://your-site.test/cp and login with your new user. Open up the source code, follow along with the Statamic docs, and enjoy!
Image Processing Guidelines
Depending on how you use this kit, you may find yourself process a lot of images. Processing images is very memory intensive, so we'd like to make a few recommendations for the smoothest experience possible.
Types of processing
- Private galleries generate processed versions of their assets if the
lowresorwatermarkoption is enabled. - This kit leverages Spatie's Responsive Images addon to optimize the load time for your visitors by generating responsive variants of each image.
Recommendations
Queues
We highly recommend using a Queue to process the images and reduce the amount of work done in any single request. Laravel Horizon makes this very easy. You may install Horizon into your project with composer require laravel/horizon. Then publish its assets with php artisan horizon:install. Then run php artisan horizon to start Horizon (or enable Horizon in Laravel Forge if you're using it).
Resize images
Down-sample your images to a max width of 1200px before uploading. This will ensure that they're never bigger than they need to be on the frontend, thus reducing the memory needed to resize. You can also make use of Statamic's Process Source Images feature to automate this. However, in private galleries you probably want to upload the images in their original size to allow your users to download them at the maximum available resolution.
Responsive images
You can generate less (or more if you prefer) responsive image variations by editing the dimension_calculator_threshold setting in config/statamic/responsive-images. The higher the number, the more variations you'll generate for each image.
Server memory
We recommend having at least 2GB of memory on your server, and be sure to allocate it to PHP by updating your php.ini file (or equivalent).
Credit
This Starter Kit was commissioned by the Statamic Team and designed/hand-built by Michael Aerni. He went not just the extra mile, but two.
Contributing
Contributions are always welcome, no matter how large or small. Before contributing, please read the code of conduct.
