 Lucky Media
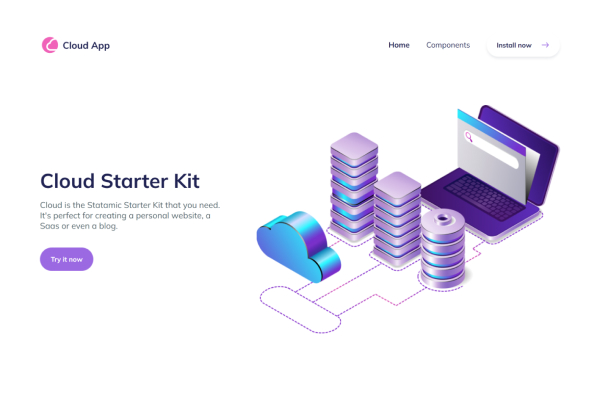
Cloud is the Statamic Starter Kit that you need. It's perfect for creating a personal website, a SaaS or even a blog. You can build your website on the fly in just a few minutes. Add your logo, choose your preferred design components and write some content. That's it, as simple as that.
Why Cloud?
We have tried to make it entirely dynamic so that you don't have to make any changes to the code. Your website can be built and modified entirely from the control panel, but you are also free to make further modifications. We have included more than 48 component designs that can be combined to deliver a professional looking website. We have thoroughly tested all the components and other design elements to make sure that they adapt to the different screen sizes. Plus, if you do change the primary colors then you can make even more combinations and your websites will look amazing.
Features of Cloud
- More than 48 component designs
- Easy customizable with Tailwind
- Component driven approach, ready-made antlers components for Buttons, Headings, etc.
- Working page builder to build the entire website from CP.
- Working Contact Form with all the fields styled ( text, textarea, asset, radio, checkbox etc )
- SEO optimized
- Favicon's and Sitemap configuration
- Main Navigation and Footer Navigation
- Taxonomies for Posts Categories.
- Super fast loading time
- Responsive images partial.
- Unicons used as Icons
- Single or Multiple Authors
- Breakpoint debugger plugin for Tailwind
- Tailwind Typography and Forms
- Alpine.js used for interactions
Installation
To install Cloud, follow the Starter Kit installation instructions. Note that you will need to be running Statamic 4.x.
Installing into an existing site
php please starter-kit:install lucky-media/cloudInstalling via the Statamic CLI Tool
If you have Statamic’s CLI Tool installed, you can create a new Statamic installation with the Cloud Kit in one line:
statamic new my-site lucky-media/cloudConfiguring
We have made sure that Cloud is ready made with everything you need. Simply access the control panel and make the changes you need. We will make sure that Cloud runs smoothly with future Statamic updates.
Content
After installing Cloud, you will see that we have pre-configured some pages and posts, just so it doesn't feel empty for you. But, you can easily delete or modify everything that we did. The Starter Kit has the following collections: Pages and Posts.
Apart from these, you have many ready made components that can be used for creating your website. Each component has about 2-5 different variants of design that you can choose from. We have designed the following components:
- Hero Section (4 sets)
- Call To Action (5 sets)
- Logo Cloud (5 sets)
- Features Section (4 sets)
- Section with Image (2 sets)
- Pricing Section (3 sets)
- Testimonials (4 sets)
- Blog Section (3 sets)
- Contact Form (3 sets)
- Newsletter Section ( 4 sets )
- Stats Section ( 4 sets )
- FAQ Section ( 4 sets )
- Page Headers ( 3 variants )
- 404 Page customizable from Globals
- Single Post View
- Standard Text
Authors
By default we have modified the Users blueprint to include some extra fields for the Authors such as Position, Social Media etc. For each post if you select an author it will be displayed in the end of the post.
Icons and Images
For Features Section we use svg icons and some of them you can find on resources/svg and we also use a Select field to display the correct icon in the frontend. In order to customize the icons head over to Unicons and just copy the right svg.
For demo purposes we included images from unDraw and Freepik, if you decide to use them for Production make sure to give correct attribution in the Footer.
Globals
We have grouped the globals into 'Theme' where you can modify the content to fit your needs:
- General
- Sitename
- Logo - by default we display our Cloud logo, but you should add your own logo (preferably SVG).
- Favicon
- We have created all the required favicon versions, but with our Cloud logo. Feel free to add your own. The favicon's were generated using Real Favicon Generator, note that you don't need to include
site.webmanifestas we generate this on the fly with Statamic.
- We have created all the required favicon versions, but with our Cloud logo. Feel free to add your own. The favicon's were generated using Real Favicon Generator, note that you don't need to include
- Footer
- Show Logo - Toggle between showing or not the logo on the footer.
- Footer Copyright
- Footer Description
- Sitemap
- Sitemap collections - Choose which collection should be included in your sitemap (default is set for Pages and Posts).
- Change Frequency - How often to instruct search engines to crawl?
- Priority - It only lets the search engines know which pages you deem most important for the crawlers.
SEO
When you edit a page on the control panel, you can see that each page has the SEO section in the entry editor. For SEO we use a free add-on called Seotamic which you can read about it below this section. Note that for Posts we use a custom ViewModel on App\ViewModels\OgImage.php and we inject it to the Posts collection in order to dynamically add a OG Image based on the Hero Image. If you don't need this feature and you want to set the OG Image manually on each post please remove this View Model.
- Meta
- Title - It can be used to determine the title used on search engine results pages.
- Title prepend - Prepends to title the text set in General SEO settings.
- Title append - Appends to title the text set in General SEO settings.
- Meta Description - It can be used to determine the text used under the title on search engine results pages. If empty, search engines will automatically generate this text.
- Canonical - By default it will be set to the page url.
- Social
- Open Graph Title
- Open Graph Description
- Twitter Title
- Twitter Description
- Image - If not set, the general image will be used.
SEOtamic
By default we make use of the SEOtamic addon which is installed together with the kit. You can control your SEO general settings here. Make sure to read the instructions on each input. This settings can be overridden on specific entries/pages as shown on the SEO section above.
- Meta
- Title - While the title tag doesn’t start with "meta," it is in the header and contains information that's very important to SEO. You should always have a unique title tag on every page that describes the page.
- Prepend on Title - This will be PREPENDED to all of the titles.
- Append on Title - This will be APPENDED to all of the titles.
- Meta Description - It is used for one major purpose: to describe the page to searchers as they read through the SERPs. Can be overridden on pages, if left blank, search engines will generate their own content for this field.
- Social
- Image - Use your logo or any other branded image for the rest of your pages.
- Display Open Graph tags - Open Graph meta tags are snippets of code that control how URLs are displayed when shared on social media.
- Site name
- Title - Keep it short to prevent overflow. 40 characters for mobile and 60 for desktop is roughly the sweet spot. Use the raw title.
- Description - General Description, can be overridden on specific pages. Complement the title to make the snippet as appealing and click-worthy as possible. Copy your meta description here if it makes sense. Keep it short and sweet. Facebook recommends 2–4 sentences, but that often truncates.
- Display Twitter Tags - Title and Description
Navigation
We have already created a navigation called Navigation and Footer. We have included the Homepage, Posts and Contact. The navigation is also designed for mobile devices. For the main Navigation you also have the ability to add a Button, in our case we added it for the Contact page.
- Homepage - You already have a few sections that can be removed or modified. You can also insert the Blog Section and it will display 3 of the latest posts.
- Posts - We display 6 of the latest posts, with the pagination included. But, you can also modify it if you want.
- Contact - This one is a button that gets connected with the contact page. You can choose different design models for the button.
Styling
The design of Cloud is done entirely with TailwindCSS. We have added many different colors on the Tailwind Config file and you can change the primary colors to make a different color combination for your website.
- Configuration of TailwindCSS
- Edit the config tailwind.config.js
- Font Family - default is sans: Mulish.
- Colors - different nuances of gray, blue-gray, indigo, purple and pink are already included.
Fonts
With the latest release of v1.1 we no longer serve fonts directly from Google Fonts. We now use Font Source to self host them.
Working with them its easy, just go to their website and search for your desired font, use npm to install it and then include it to the site.js file.
More info on the official documentation of Font Source.
Compiling Assets
By default we make use of Vite with Laravel to compile all the assets. Make sure to run the following commands after installing the starter-kit.
-
npm install- to install all the required dependencies. -
npm run dev- to run in development mode. -
npm run build- to compile assets for production.
Commercial addon
Cloud is a commercial starter kit - you must purchase a license via the Statamic Marketplace to use it in your project.
🐞 Bugs and 💡 Feature Requests
Please refer to the issues tab to submit a Bug or a Feature Request.
Credits
Cloud was brought to you by the lovely team at Lucky Media, we are a digital agency focused on professional, innovative, user-oriented web design & development. If you have any project in mind feel free to contact us.
Last but not least thanks to the creators/contributors of the following packages which made Cloud a reality:
- Statamic CMS
- Tailwind CSS
- Alpine.js
- SEOtamic